Reproducing Image Noise On Touched-up Parts of Noisy Images Using Photoshop
Adding proper noise over newly added elements on a noisy image
Removing facial hair on a photo for morph optimization
created on 10.02.2004, updated-05.07.2005 - Removed tables
Introduction
Hi, this is my first tutorial. I hope you enjoy it and find it useful. Sorry for lack of design, but hesido.com will be your place for one pager tutorials, and I keep readibility over a funky design when it comes to tutorials :).
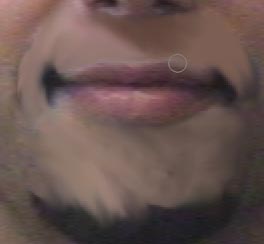
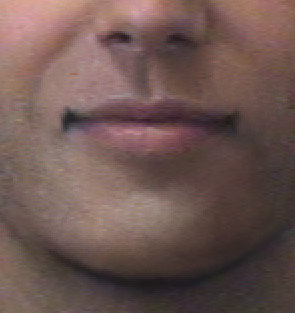
Ok, here we have a person with a beard, and the reason I want to remove the beard is to ensure that the morph to a second person (lacking the same amount of facial hair :) ) will look nicer. For the morph (which is not part of the tutorial), I use the excellent and free morph tool by , the tool is WinMorph. I also use a Wacom Graphire Tablet which helps me to no end. I'd also like to point out that the x2 versions are for you to see the noise better, if you would like to go by my tutorial using the same image, please use the original image and not x2 version, because we can't effectively "catch" the noise if the noise is doubled in size.
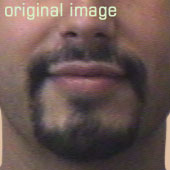
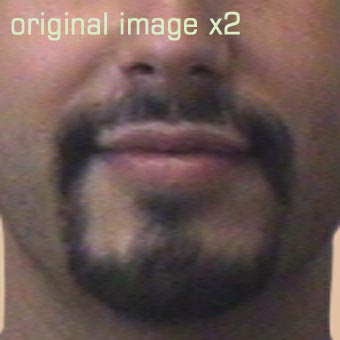
Here you see a highly noisy image. What we will do is we will paint over the beard, and afterwards re-apply the lost noise back onto the image. Here is the end-result:
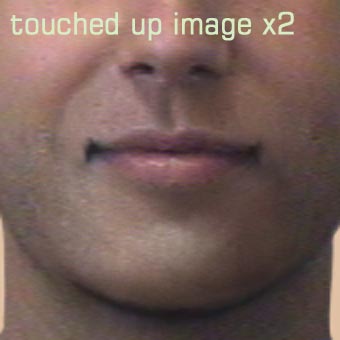
You may like or dislike the shading, but we have to agree I have them noises back on the photo's touched-up parts :) This tutorial does not concentrate on the artistic part of the process.
The tutorial
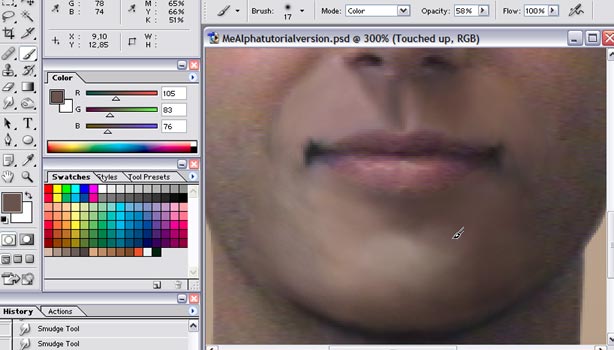
A practical workspace
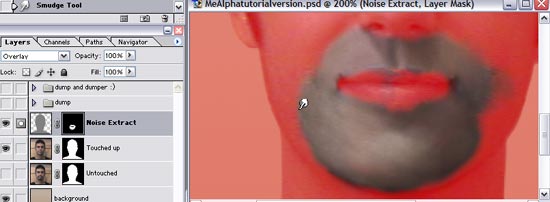
Let me start by showing you my workspace. My desktop is 1280x960. As you see I leave the tools on the left hand side so the tool windows stay open for easy access all the time. You can setup and save your workspace through . Click on the picture for larger version.

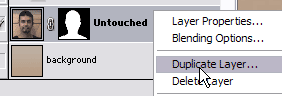
Duplicate, don't destroy
We will start by duplicating the layer that we want to modify, we'll need it later. You have to backup anything you change just in case of a screw-up anyway :)!
Painting in the new element
We'll paint over the beard using a mixture of , , and tools. Here is a rough in-between:
After fully painting over the beard, we may use and tools to add some shading and to fix hue errors, and then some to fix oversaturated areas with soft brushes. Here is the final shading:
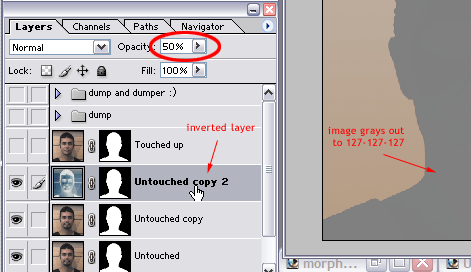
The inverting trick
We see that the shading sort of matches the rest of the picture, at least, I hope so :) Now the missing thing thing is noise. If we put some noise on it, our mistakes will also be covered :) Here is the fun part, and what this tutorial is all about. We'll duplicate the untouched layer twice, invert the top most duplicated one, and then reduce its opacity to %50. You will see that out image is grayed out as the two layers are exactly the same, only one of them is the negative of the other.
Medium/High frequency noise capture
On the same inverted layer, we will apply , this way we are removing the noise from the inverted layer, and as it is inverted and at a 50% opacity, it reveals the noise beneath. This is the key element in the technique. I used a median with a radius of 2 in this example. You may also use a very small amount of instead of median. Here is a two frame animation revealing the effect of median.

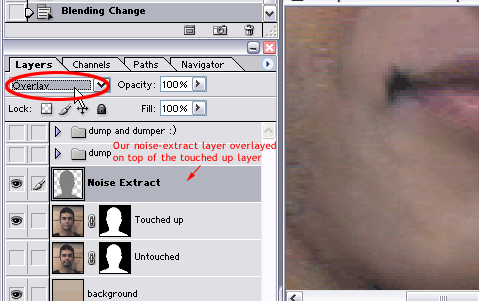
Now, we will merge the two layers and produce a single layer out of the duplicated two layers. We now have in hand a gray layer with some noise on it. We did it, we got the noise :) We will make this layer an layer and put it on top of the touched up layer. We'll leave the opacity at 100% as we need every bit of noise we can, and the noise in its current form is not strong at all.
Now we have some noise on the touched-up parts!! But as the overlay is applied to the whole layer beneath it, the places which have already noise now have bigger noise. We will simply mask out the parts that we didn't touch from the overlay layer. Just add a layer mask to our overlay layer by pressing at the bottom of the , and select the mask layer, and paint white over places we want to reveal and leave places to be hidden in black. Here I used a soft brush for the mask layer so the edges blend smoothly, you may also tweak with here and there. We don't have to be precise.
Masking our noise
Now we have the overlay layer affect only those parts we touched up so it doesn't bother the rest of the picture. But you'll see that the noise is far from effective, we need to make it stronger. We will use a levels layer for precise control. I try to use layers instead of fixing the layer, so I can change parameters later for fine-tuning. We'll get up our running by selecting from the button at the bottom of the . Do not play with it just yet, we'll put it on top of our noise extract layer and then it to the that layer by pressing . This way, the levels will only effect out noise extract layer. Now, we can adjust the levels so the noise on touched up regions is as strong as the rest of the photo.

Make sure you have set to on so you can adjust the noise contrast on the with on the fly preview. Set the and a little bit closer to the middle, where all the grayish colours are gathered. This way, we are precisely adjusting the contrast of the noise extract layer, and we are able to modify the contrast of brighter and darker noise separately. You must leave the at 1,00 (which is at the center), or otherwise the brightness will shift. You can also set it to 1,00 using the numerical input box. Make your adjustment until you feel content with the noise levels which should conform to rest of the picture once correctly set. Voila, we have the photo ready for further torture now :) Please hover your pointer on the image below to see how we kept the noise.
The result
Here are the middle frames of a morph animation with (a) and without (b) facial hair on the target image. You see in (a) that there's a faded beard, but in (b), we have made it look a bit better :)
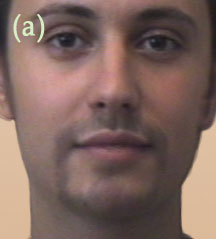
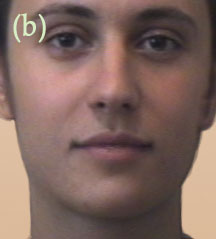
For the record, the person in the picture is not me, as it is a morph frame. I can safely say that person does not exist. The bearded person we have worked during the entire tutorial is me, tho.
Final Words
I hope that you found this tutorial useful. Feel free to email me comments and critiques and even some fresh ideas :) This technique could be applied to even videos if your video editing tool lets you do similar layering. You apparently do not have to remove beards only, it should work for anything :).
And an update
I received an email from of Splutterfish, reminding me about the usage of highpass filter to grab the noise. I did a few tests which revealed that the highpass filter works perfectly for noise with high frequencies, but didn't produce results as good as in this example, due to the fact that when you do a highpass filter with a higher radius to grab noise with lower frequencies which is present in the example image here, the darker and brighter areas show their silhouettes, which hinders the process to some extent. Still, with a low radius, highpass filter gives instantly good results and it is pretty much straightforward, and should work for most of the photos. Thanks to for the nice feedback.
I also added a brand new tutorial on how to make a nice 3d looking flag easily with photoshop, check it out.